HostingSeekers WHMCS Module
WHMCS Updated on : February 20, 2026Table of Content
What is HostingSeekers WHMCS Module?
The HostingSeekers WHMCS Module is designed to simplify and automate your hosting management. Easily sync your hosting plans and pricing between WHMCS and your HostingSeekers account, ensuring accurate and up-to-date information at all times.
With this module, you can ensure seamless product updates. If a product is out of stock or temporarily hidden, the module will automatically reflect these changes in your HostingSeekers account. This way, your customers will always have access to accurate product details, building trust and providing a smooth experience for you and your clients.
HostingSeekers WHMCS API
These api files allow you to directly fetch hosting plans (WHMCS products) from your WHMCS on the HostingSeekers portal.
How to upload the module files?
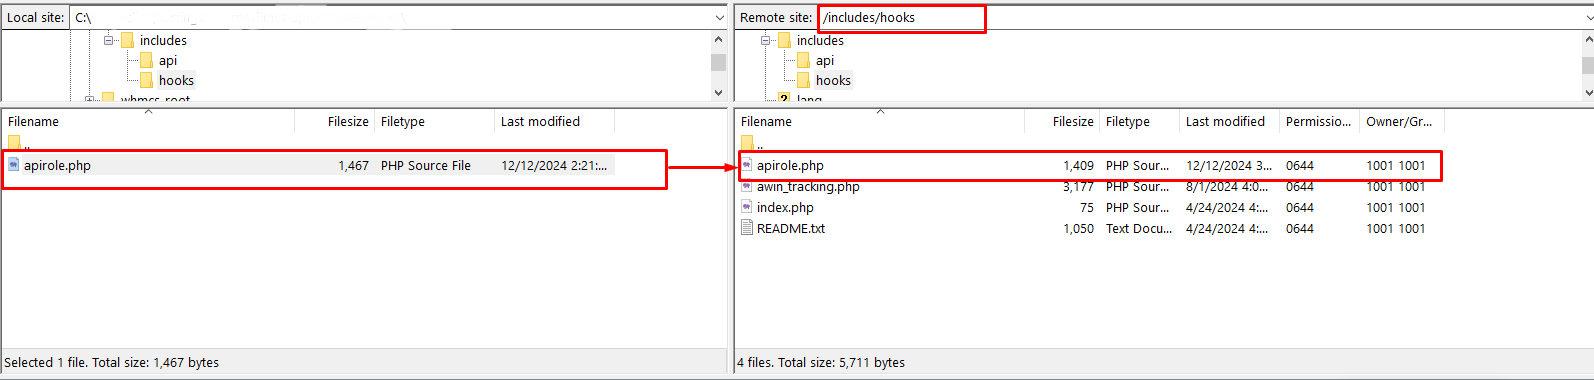
1. Unzip the download folder and upload the includes folder at your WHMCS_INSTALLATION_DIR using FTP/SFTP/cPanel
Verify module upload.
1. Go to the “WHMCS_INSTALLATION_DIR /includes/api” and check the files Getproductgroupshs.php and getproductsbygidhs.php.
2. Go to the “ WHMCS_INSTALLATION_DIR /includes/hooks” and check the file
apirole.php.
How to configure the module?
1. Log in to your WHMCS admin area. Go to System Settings >> Find api credentials and click on it
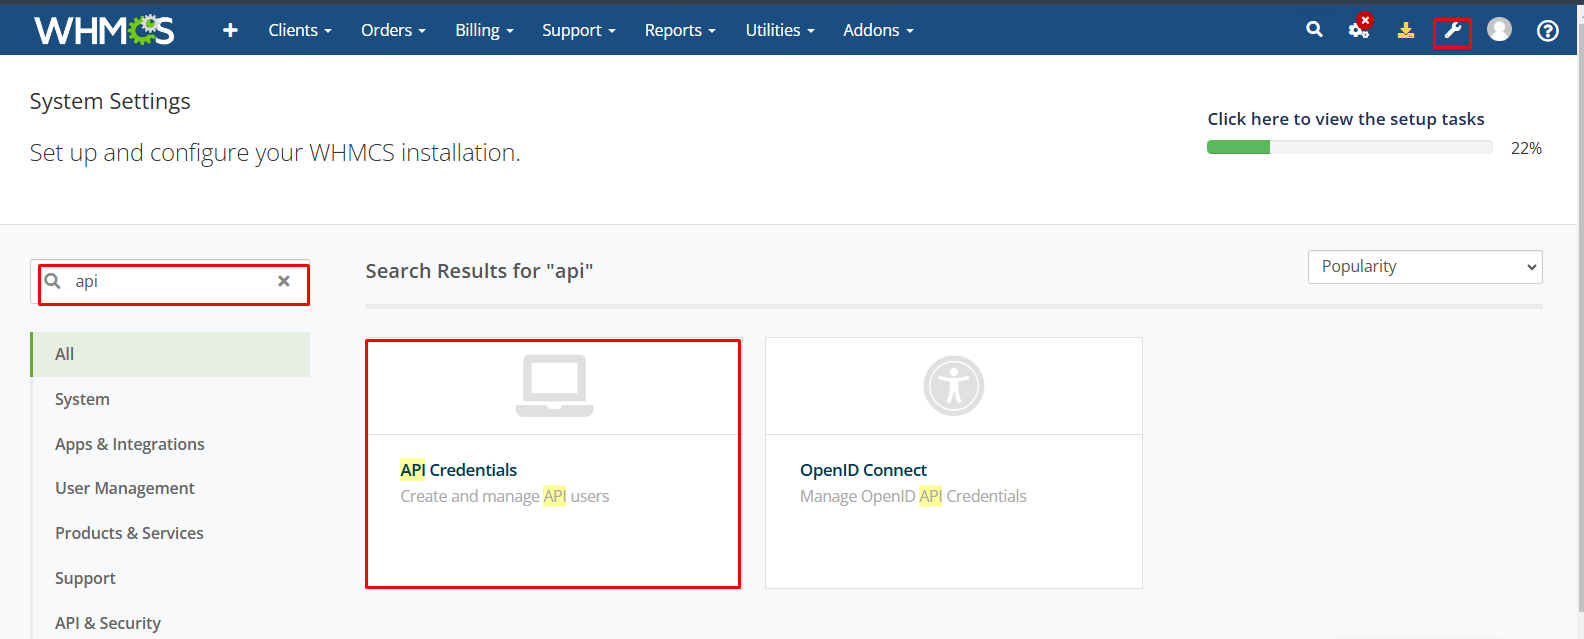
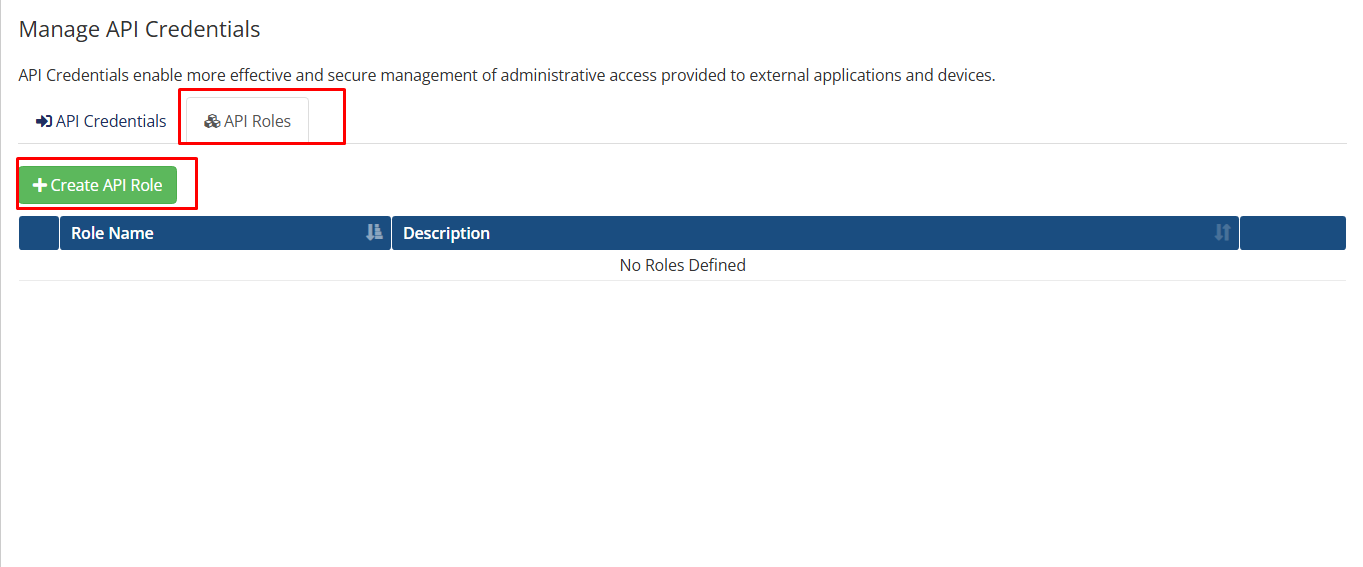
2. After that, click on the API Roles, and then click create new API Role
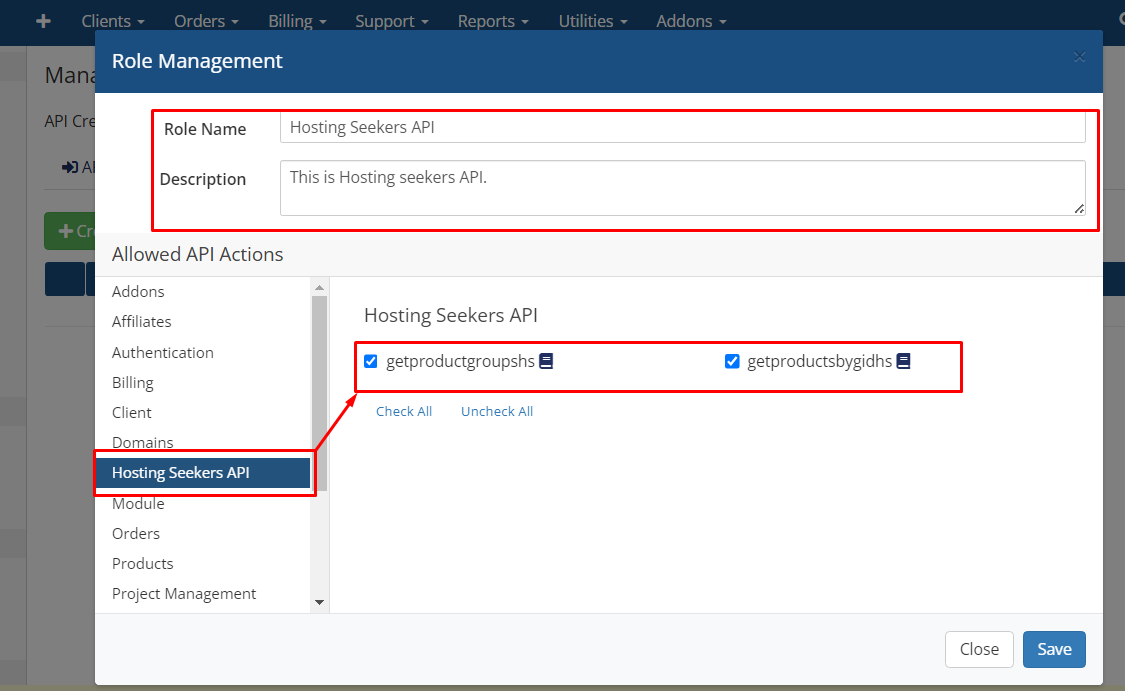
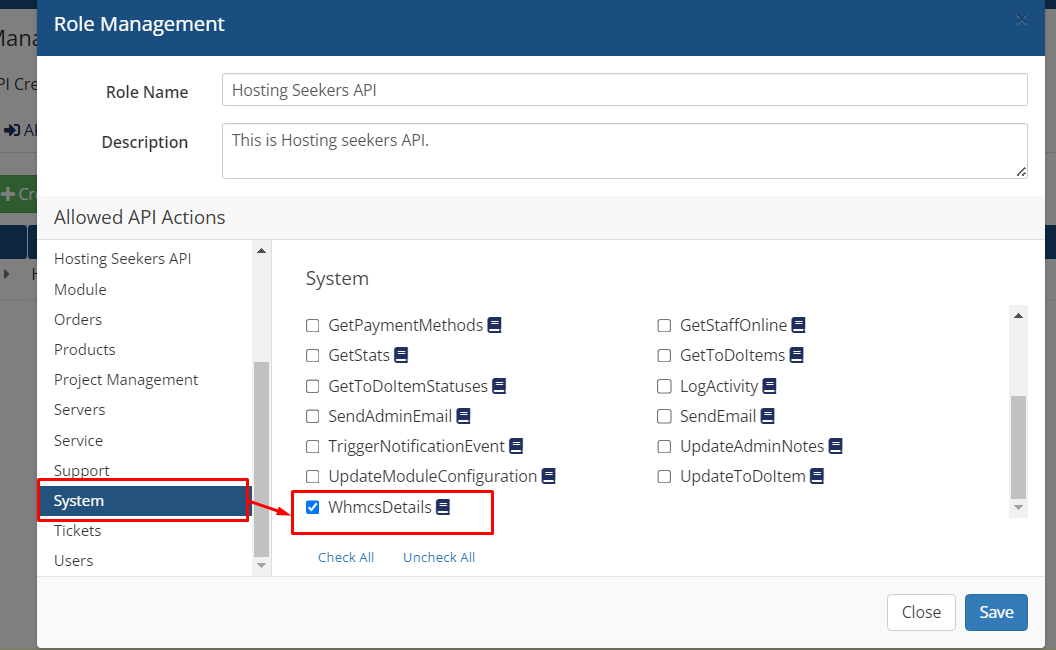
3. Enter the Role Name and Description for the API. Then, select the allowed API actions related to the “Hosting Seekers API.” Ensure that all API actions associated with the Hosting Seekers API are chosen. And also, under the “System” section, check WhmcsDetails, and then click Save.
4. After saving, go to the Manage API Credentials page. Click on API Credentials, then select Generate New API Credential.
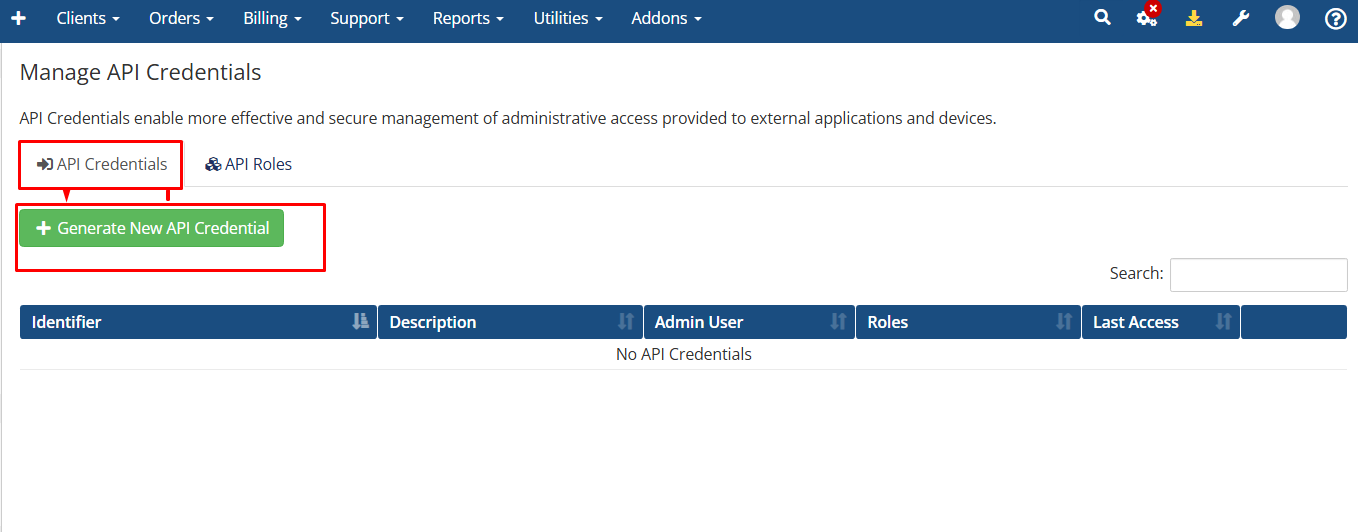
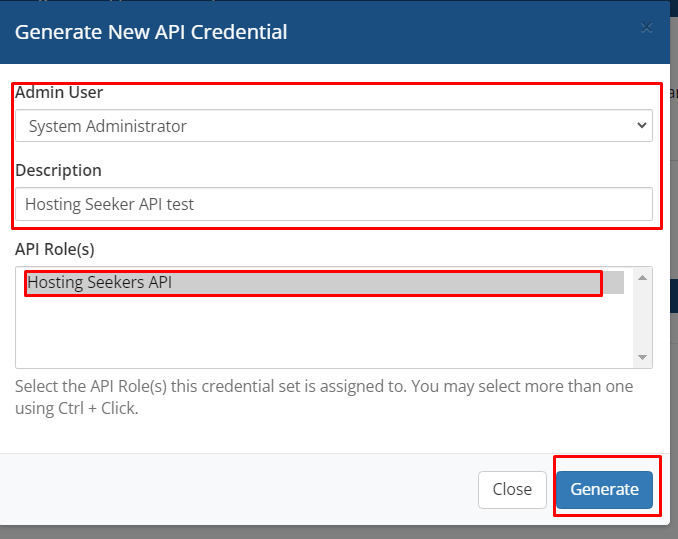
5. A popup will appear. Select the admin user, description, and the API role(s) you created earlier (e.g., “Hosting Seekers API”), then click Generate.
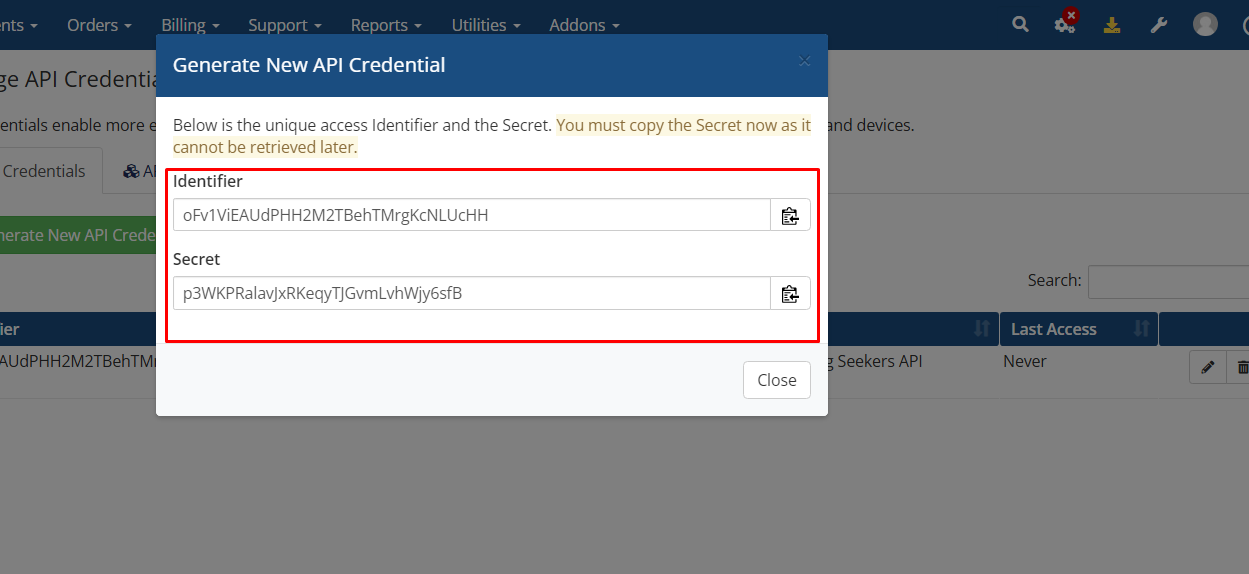
6. After generating, your Identifier and Secret will be displayed. Make sure to copy them for future use.
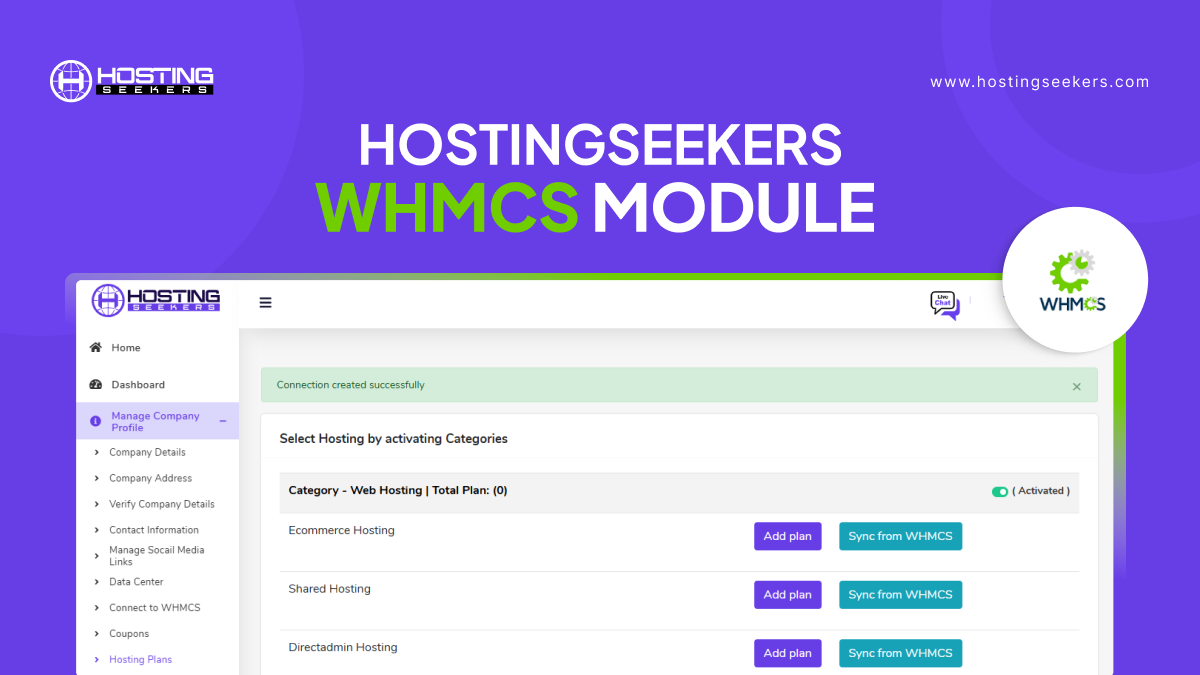
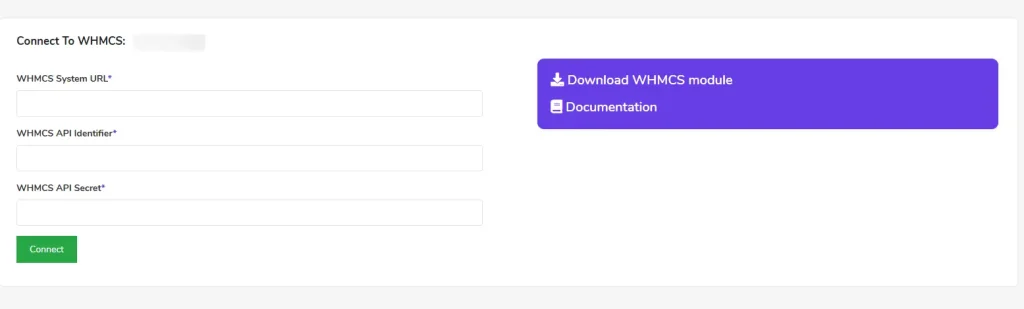
7. Log in to your Hosting Seeker Dashboard. First, click Manage Company Profile, then Connect to WHMCS.
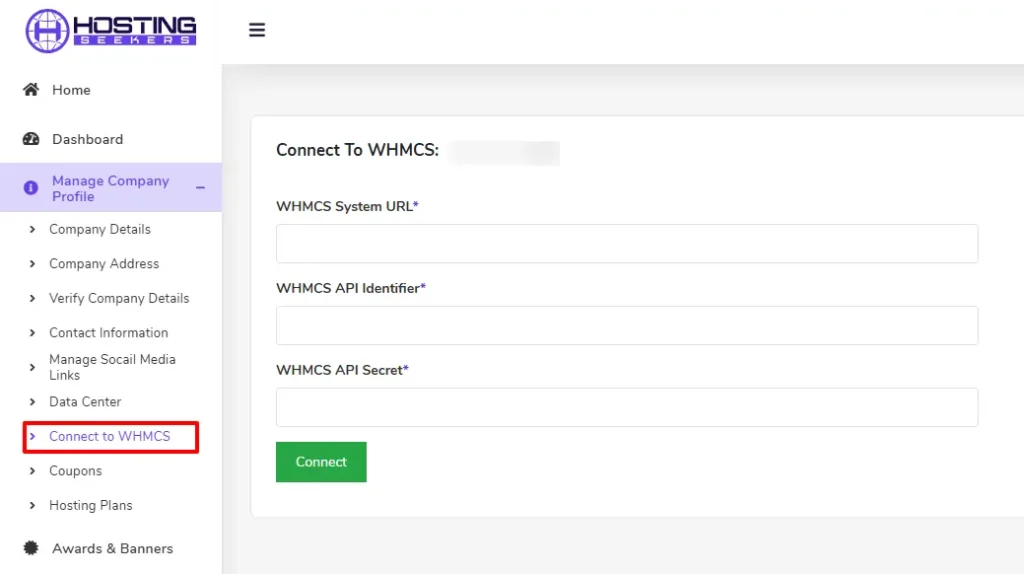
8. After clicking, You will be redirected to the “Connect to WHMCS” page. Enter the WHMCS System URL. To find this URL, log into your WHMCS admin area and go to System Settings > General Settings. Under the General tab, you will see the WHMCS System URL. Copy the URL and paste it into the WHMCS System URL field in the Hosting Seeker dashboard.
9. Additionally, enter the Client ID (the Identifier key generated in step 6) and the Secret ID (the Secret generated in step 6) and click on the Connect button.
10. If you encounter an “Invalid IP” error, log into the WHMCS admin area, go to System Settings > General Settings, and under the Security tab, enter the IP shown in the error message in the API IP Access Restriction section, then click on the Add IP button.
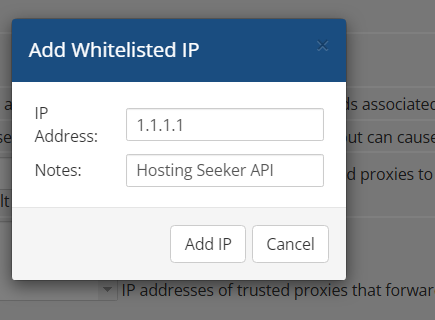
Go to the hosting seeker’s admin panel and reconnect again.
11. After successfully connecting, now sync your WHMCS to Hosting Seeker. Click on sync your WHMCS
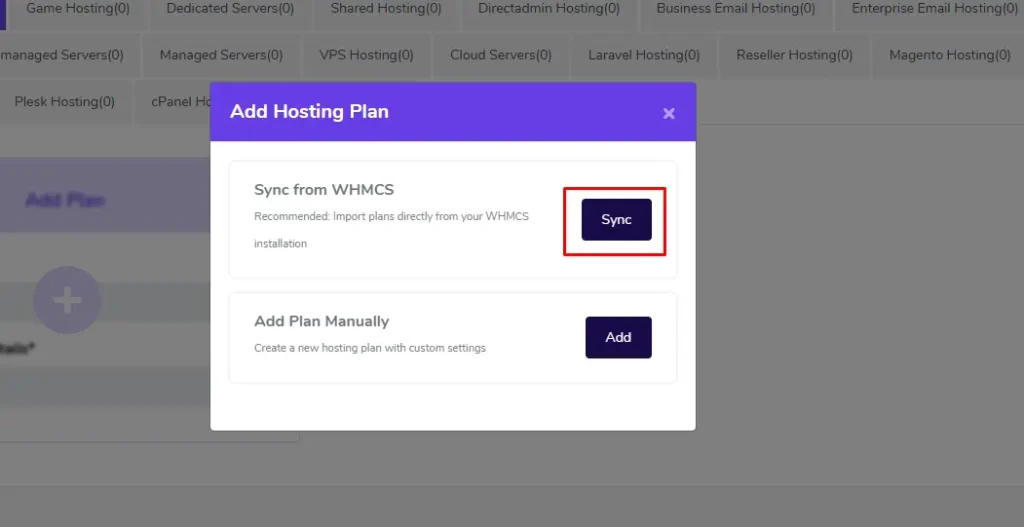
12. After Sync, select the Product Group and click Get Products.
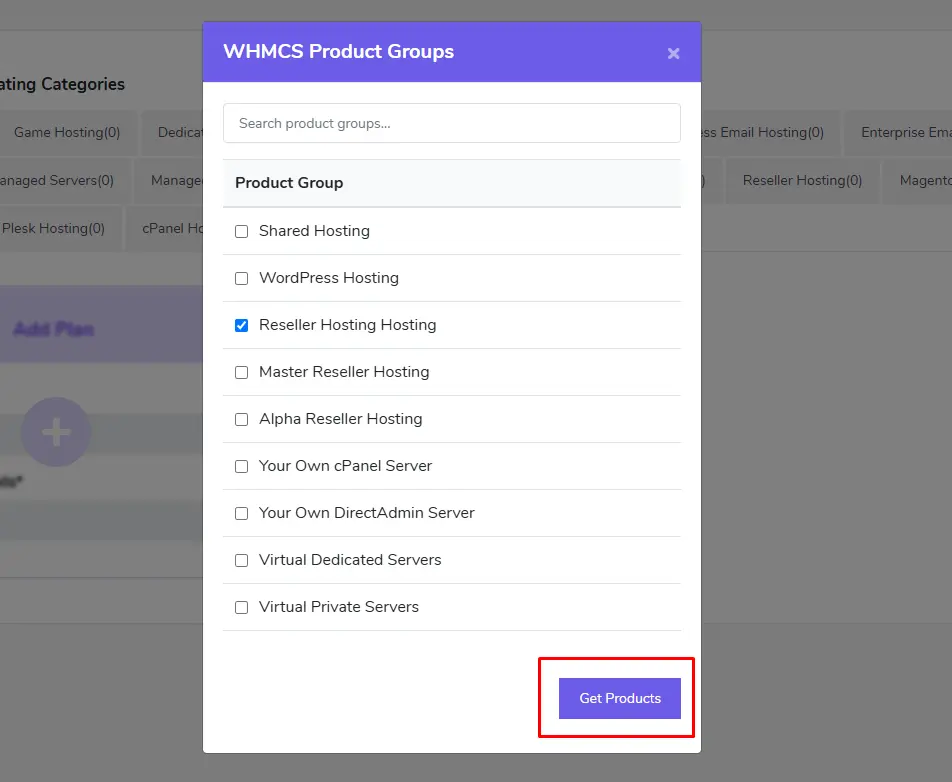
13. Now, all the products are listed in that product group. Select any product and click on the Save Button.
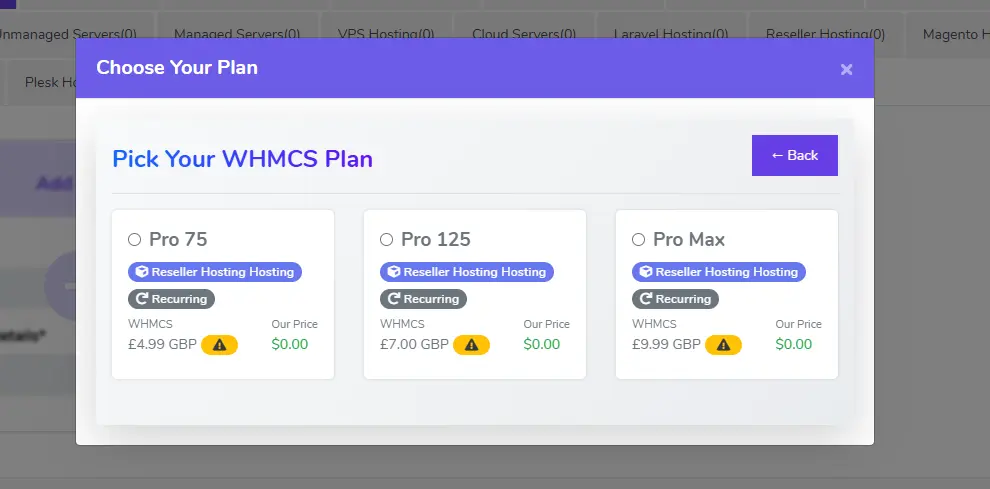
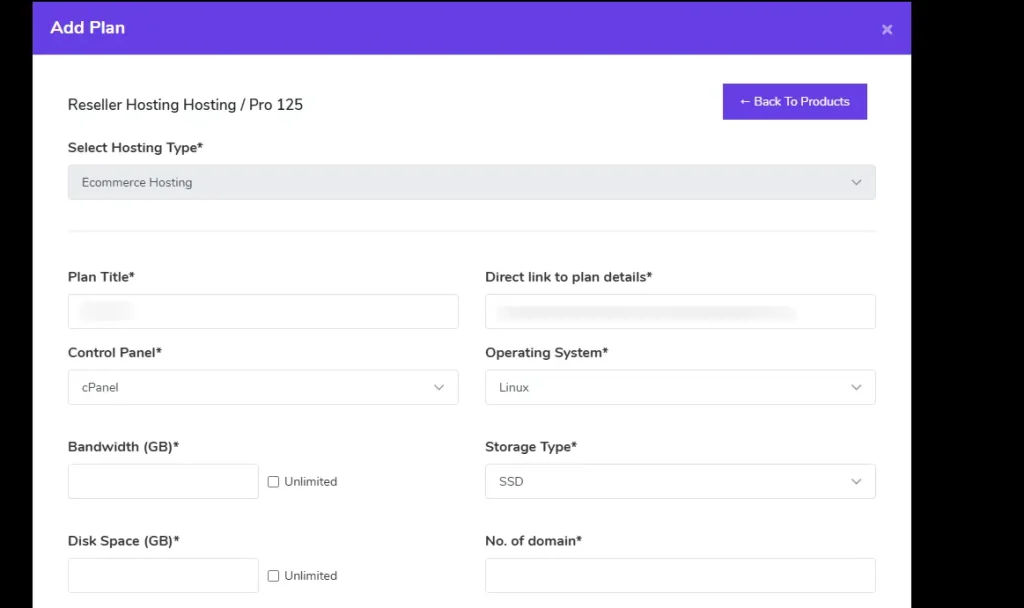
14. After selecting the plan, you can edit the configuration and click the Submit button. It will add the plan to your company dashboard.
manvinder Singh
https://www.hostingseekers.com
Manvinder Singh is the Founder and CEO of HostingSeekers, an award-winning go-to-directory for all things hosting. Our team conducts extensive research to filter the top solution providers, enabling visitors to effortlessly pick the one that perfectly suits their needs. We are one of the fastest growing web directories, with 500+ global companies currently listed on our platform.