
How to Set Up a Virtual Private Server (VPS)?
VPS Updated on : December 31, 2024Virtual Private Server is the best option for businesses and individuals who require scalable, reliable and cost-effective hosting solutions. But, setting up a virtual private server might appear daunting. This guide will help you to set up a VPS, highlighting its significance in the realm of web hosting. Let’s walk through the step-by-step process of setting up a virtual private server.
What is a Virtual Private Server?
In layman’s terms, VPS is a web hosting service that allows users to have their own exclusive web hosting environment. In VPS hosting, a single physical server is divided into multiple virtual servers, each functioning as an independent unit with its own operating system, resources and dedicated storage.
Speaking about market size, the global virtual private market size is expected to grow from $2.4 million to $5.0 billion by 2023 at CAGR of 15.3%
(Source: Marketsandmarkets.com )
Why Should You Configure a New VPS?
There is a high chance that your provider will install all the software you may require to utilize whenever you sign up for a basic hosting package. This may also come with a hosting control panel. You have every feature you need to configure your account in these hosting control panels. However, because other users are also utilizing the same machine, you won’t typically have the opportunity to change your server’s actual settings.
VPS provides you with a dedicated server environment, giving you full control and exclusive access. In most cases, your web hosting provider will only set up the basic server software, leaving the rest of the setup to you. Consequently, you’ll need to take additional steps to get your server ready.
These steps involve selecting the appropriate time to use VPS, becoming proficient in connecting to the server and issuing commands, learning how to install and update software, setting up new user accounts, and implementing a firewall for security.
Steps to Set up a Virtual Private Server
- Selecting the Right Hosting Provider
- Connect to a VPS through Secure Shell (SSH)
- Update Your Server
- Setting Up a New User
- Enhance Authentication with SSH Key
- Set up Firewall
Lets discuss these steps in detail:
Step 1: Selecting the Right Hosting Provider
The first crucial step is choosing a reliable hosting provider that offers VPS services. Look for providers that offer competitive pricing, robust security features, good customer support, and a variety of plans to suit your requirements. Hosting seekers have listed top VPS hosting providers through which you can choose the right provider for your business.
Step 2: Connect to a VPS through Secure Shell (SSH)
To connect to your VPS, you have various communication protocols. FTP enables upload of file, While SSH enables proper VPS configuration through an encrypted connection. SSH works via a command line interface on Unix-based systems. It ensures strong authentication and encryption for security. The hosting company provides credentials like root username and password. On unix, you can connect immediately utilizing the root account. For Windows users,PuTTy is recommended for working with SSH.
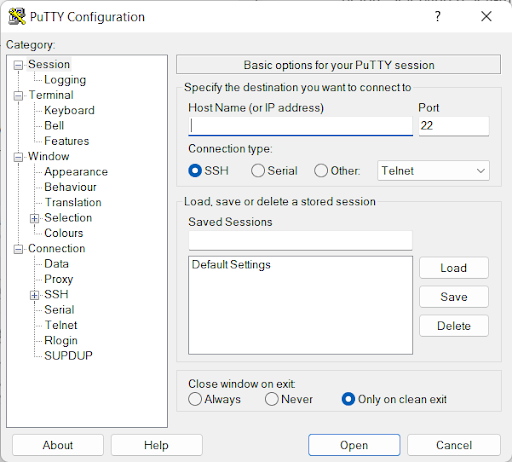
To access your VPS, there are different communication protocols available. For file uploading, you can utilize the FTP protocol. However, to configure your VPS effectively, you must use the SSH protocol.
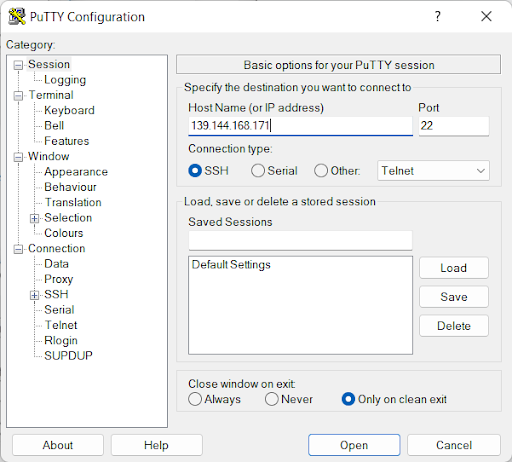
To begin, input the IP address of your server in the Host Name (or IP address) field and keep the Port setting as 22.
The server will receive the request through port 22 and proceed to identify the username, typically “root,” and prompt for your password. After providing the correct login credentials, a welcome message will be displayed on your command-line interface (CLI) as depicted below.
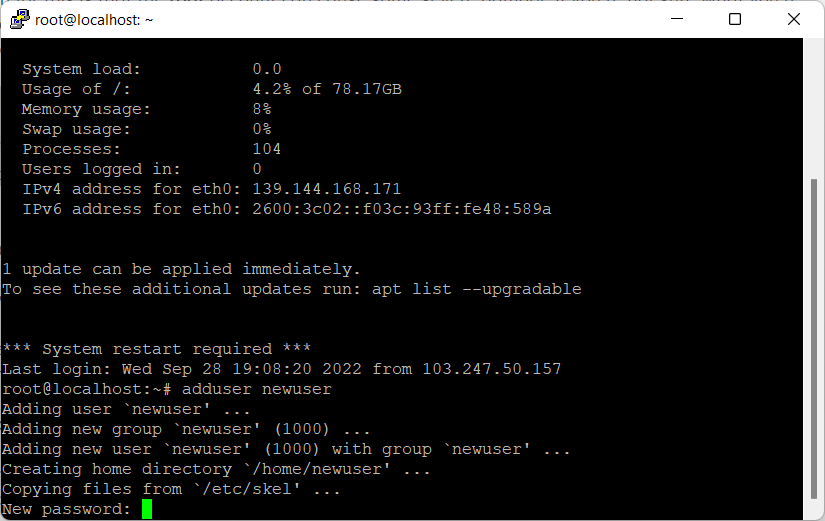
You’ve successfully entered your self-managed VPS.
Step 3: Update Your Server
Please ensure that your VPS is regularly updated to maintain the security and proper functioning of the projects hosted on the server. Take responsibility for updating the server and keeping it secure. When you connect to your VPS and find available security updates, initiate the process by entering the “apt update” command and pressing Enter. This ensures that your server stays up to date with the latest security fixes.
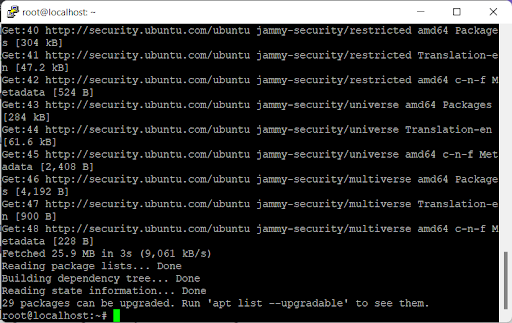
Your server will first check for packages that need upgrading. Once the check is complete, execute the command “apt upgrade” to update the packages on your server.
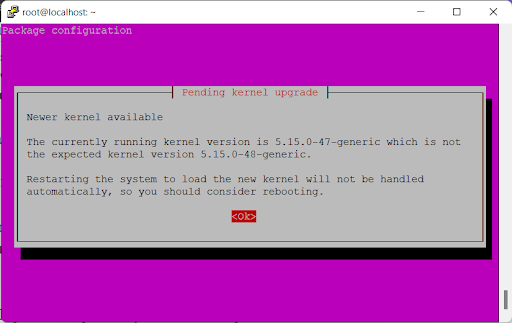
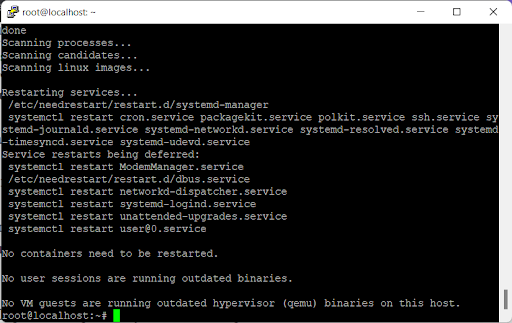
After updating all your packages, initiate a server restart using the “reboot” command, and then close the command line window. Wait for a few moments before logging back in using your client software, such as PuTTY. If the update was successful, there should be no further available updates. Keep in mind that the specific commands may differ depending on the Linux distribution you are using; for instance, CentOS and RHEL may require the commands “yum check-update” or “dnf check-update.”
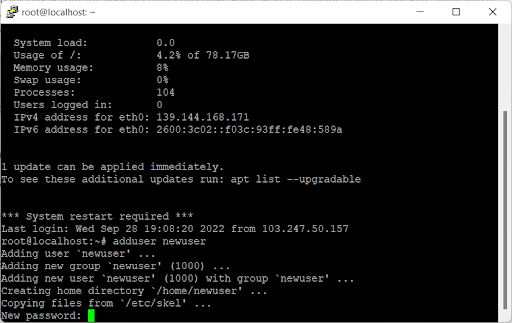
Step 4: Setting Up a New User
In Linux, the root user is like the owner of the system, having unrestricted access and the ability to do anything on the server. When logged in as root, you have full control.
On the other hand, regular user accounts have limited permissions and require the “sudo” prefix before executing administrative commands. This provides an added layer of security by preventing accidental misuse of powerful commands.
To create a new user account, you can use the “adduser” command followed by the desired username. The system will prompt you for a password and other necessary information. After creating the account, you can grant it superuser privileges by adding it to the “sudo” group using the “usermod -aG sudo [new username]” command. This allows the user to perform administrative tasks when using “sudo” with appropriate commands.
You can end the SSH session that is running and log in using the new user account to make sure everything is functioning as it should.
Step 5: Enhance Authentication with SSH Key
To bolster your security against specific attacks, it’s advisable to use a stronger authentication method. While a strong password can be effective, SSH offers an even more secure approach by using a public-and-private key pair to authenticate individual users.
To get started, you’ll need to create an SSH key, and on Windows, this can be easily done using the PuTTYgen program, which comes bundled with the popular SSH client, PuTTY. Upon opening PuTTYgen, click on the “Generate” button, and the application will generate both a public key and a private key for you.
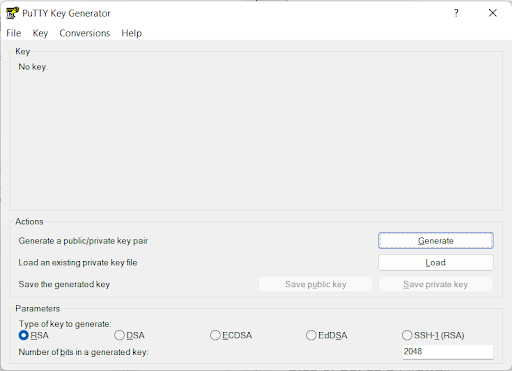
The top box, which contains the public key, may be seen. Before moving on, you must also choose a passphrase that will serve as both a password and a key pair. To save the key to your computer, click Save Private Key.

Access the SSH settings, then go to the “Connection” menu, followed by “SSH,” and finally select “Auth.” This will allow you to make use of a set of keys and establish a connection to your account via PuTTY. To choose your personal key, remember to save the changes by selecting the “Private Key File for Authentication” option.
Step 6: Set Up Firewall
Installing and configuring a firewall is of utmost importance when hosting servers. The firewall’s role is to monitor both incoming and outgoing traffic, ensuring that only authorized individuals can access the data.
On most Linux distributions, the default choice for managing traffic to and from the server is the iptables firewall, which is usually available by default. However, various distributions may use different programs to establish firewall rules, like UFW in Ubuntu and Firewall in CentOS. These tools are designed to simplify the configuration process for iptables. It’s essential to note that these firewall tools have distinct operating methods and syntax, so it’s crucial to refer to the respective OS documentation to understand how to work with them effectively.
Wrapping Up
Managing a self-managed VPS needs constant attention and optimization to enable its efficient performance. However, operating a VPS can become manageable with dedicated effort and proper guidance. There are abundant resources available that will allow valuable insights and step-by-step instructions to navigate this process effectively.
So, how can you identify the best-managed VPS option suited to your needs? HostingSeekers helps you to choose the best advice and authentic client review, assisting you in making an informed decision.
manvinder Singh
https://www.hostingseekers.com
Manvinder Singh is the Founder and CEO of HostingSeekers, an award-winning go-to-directory for all things hosting. Our team conducts extensive research to filter the top solution providers, enabling visitors to effortlessly pick the one that perfectly suits their needs. We are one of the fastest growing web directories, with 500+ global companies currently listed on our platform.